Showing posts with label diy. Show all posts

Tuesday, March 13, 2012

Creative Projects: DIM (did it myself) desk

Okay so when i say DIM (did it myself) what I really mean is that I searched and sifted through dozens of images on pinterest and found an inspiring idea to create a grand desk from wall to wall in our family room.A space for me to craft and write and gather inspiration or should I say "pin"speration. I then approached hubby with this idea and HE basically made it in a hour. I did help hold up stuff and pass things to him and cheered him on when the project had its frustrating moments. In the end I am so thrilled about my new desk and the creative space that I am typing away here at and I feel this sense of ahhh...a space of my own.
So here's basically how we did it, sparing you the mundane little details. First Alex screwed the brackets on the wall .
Then he screwed the top on it which is some melamine coated particle board that was only $35 at home depot. They cut it to size right there. All in all this was a pretty easy and straighforward project if you have a drill and a level. I edited the words CREATE on the wall because eventually I hope to get some letters or a decal of some sort that speaks to creativity. One side is for Alex's music production stuff and one side is all for me! Check out the organizational cabinet to the left of my corner. I got that at the habitat for humanity re-store for a steal! There is still some work to be done. ie. shelving and art on that back wall but part 1 is complete. I am completely happy!
I should also mention that I got those desk chairs at a second hand furniture shop for about $30 each and they are basically brand new. Voila!

Wednesday, February 8, 2012

New House: Project Fireplace


For those of you who don't know, we recently purchase a new home that i am absolutely thrilled about. Its a 4 level backsplit, so despite its small appearance in the photo there is more than enough room for all of us to grow. All 9 of us! 5 people, 4 pets to be exact.
The house is a cosmetic fixer upper. Structurally the house is sound but the 80's carpet, and melamine kitchen cabinets will slowly but surely have to go. One of the first projects I decided to tackle was the dated fireplace. I was so excited because I've been gathering ideas for fireplace decor long before I ever had one. I knew exactly what I wanted to do, no question about it...white! The bricks before were a dusty rose colour which i'm sure looked lovely with the matching dusty rose carpet we need to tackle soon. The insert was a dark brown and brass. Now I heard brass was coming back with a vengeance (house and home january edition) but the brass fireplace accents had to go as well.
If you are thinking about painting your bricks white too, let me give you a warning that I didn't really listen to. Bricks soak up paint like crazy, get yourself a gallon of good primer and be prepared that it may take a while. I'll be honest, I hated the priming and quit, handed over the job to my hubby. I added the much easier to apply coloured latex paint in a pearl finish. White down OC-131 by benjamin moore. I love this colour, I also have used it on my kitchen cabinets at our last place. Its just a touch warmer than the trim white. The fireplace insert we spray painted with a black paint typically used on bbq's so its good for high heat. And voila! I added a few off white ceramic pitchers from my collection and our "Family Rules" and I couldn't be happier with how it turned out! What do you think?

Saturday, March 26, 2011

DIY discoveries for spring

Martha Stewart: Cherry Blossoms made from vellum and embellish woody branches

Jelly Belly: Look at thes darling decorated cupcakes!

Source Unknown: I love thes hairbands, and if you buy a bunch of plain hairbands you can add the felt flower and button with no problem!

Yarnista- Yarn Wreath with felt embellishments

Spearmint baby- Fabric fridge magnets! Love these! Not really a spring craft but I still wanted to share.

Aunt Peaches- Coffee Filter Roses

Happy Crafting,


Friday, February 25, 2011

Quick Project...painting hallway mirror

I woke up on Family Day last Monday and felt like I had a creative energy stirring, I had to craft something, I needed to paint something. I decided I would finally tackle that mirror in my hallway that I have had forever but just doesn't inspire me anymore. I wanted to paint it BLUE!

I started mixing some colours from my paint collection with some benjamin moore white down cc-50 and added some crafter's acrylic paint, a dab of this a dot of that, no precise measurments.


Within moments the mirror was transformed! I love quick projects! Eventually I plan on painting that cart in the hall way off-white which will look much better I think. I added a few blue accessories to tie it together and it has freshened up my entrace way! Amazing what a little paint can do.

Saturday, February 12, 2011

Quick Project...Framed Chalkboard


Upon my inspiration searches through magazines and online there is a lot of chalkboard talk. People are using chalkboard paint to turn their walls and doors into writable surfaces. I have even seen entire refrigerator turned into a chalkboard. Now, my project is nothing as drastic as painting my fridge but I like the idea of having a chalkboard to write inspiring words and quotes as I choose. I also think it fits the country/cottage theme of my decor nicely. So I headed to the dollarstore for this affordable and cute little project. The foam board and adhesive blackboard were both $1.00 each! Then I already had the frame here. It would be easy for you to purchase a frame at a second hand store as well. I eventually would like to do a larger framed chalkboard for my kitchen.


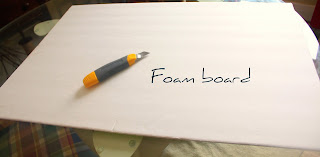
Cut foam board to fit the inside of the frame


I used this adhesive blackboard from the dollarstore for a quick fix but you could definitely use chalkboard paint which would probably last longer. If you choose my route, take the adhesive black board and slowly remove the back paper and smooth it over the foam board. Remember to smooth out bubbles as you go. Trim blackboard adhesive using your utility knife and fit it into your frame, if there is glass on the frame, remove it before you put your foam black board in it.

Write whatever message you want inside your chalkboard and display proudly!


Monday, August 16, 2010

My Vision Book

Hi...I'm Tammy...and I'm a "mag"aholic... I admit that I have subscriptions to 5 different magazines because it will "save me money" and I wont have to buy them at the check-out. However, somehow those glossy magazines that I don't yet have a subscription to always seem to fall in my cart. Magazines are often a really quick "high", often times so filled with useless ads that within 10 mins, it's over. I have piles and piles of magazines. Martha Stewart's (1999-present) beautiful covers line my shelf and I can't seem to part with them. There is such joy that comes, when I open that mailbox to that perfectly wrapped in plastic magazine. The best part is that because I have five different subscriptions they all come at staggered times during the month. It's like presents keep arriving in the mail just for me! I believe that getting stuff in the mail (snail mail) is still far more exciting than receiving an email. I've always found use for my magazines when I've created my vision boards, clipping out things that I am hoping to attract into my life and pasting them to a canvas. This is a great way to send your intentions out to the universe. However, even after using some bits and pieces for my 8 X 10 vision board, I am still left with piles and piles of magazines! Then my friend Sunshine told me about this "scrapbook" that she started, in order to make use of all the magazines. She started clipping out any idea, recipe, design idea, craft or fashion that she liked from the magazine and glued them into the scrapbook in categories. She enjoyed it so much, she gave me a freshly recovered scrapbook for Christmas this year. I believe the vision book or scrapbook if you prefer, has several great purposes. First of all it's a great way to use the magazines, secondly it's a great way to get to know the things that you love and third it's a great resource for ideas (like recipes and crafts) and lastly its a wonderful way to send your intentions out to the universe. That's why I've decided to call it my vision book. I have a whole section on Christmas ideas that I love, kitchen and dining, bedroom ideas, hallways, crafts and gardening. The best part is that there are no rules so I can add new categories and paste anything I want into my vision book. Here's what you need to start your own vision book: 1. Get yourself a spiral bound sketch book 2. Recover it with beautiful bright wrapping paper or scrap booking paper (optional step) 3. Find some quiet time, I find that right before I go to sleep is a good time, I take even just one magazine and go through it for ideas I want to clip out. 4. Cut out images, glue or tape them in your book 5. Enjoy looking back at all the beautiful images you have compiled over time!